

That intricate square bracelet you’ve seen everywhere looks complicated, but it’s surprisingly simple. It’s built with just one knot, repeated over and over. You don’t need any special tools, just a few basic supplies.
Here’s what you’ll need:
- 4 strands of Embroidery Floss: Pick two colors you love. To get the right length, measure each strand from your fingertips to your shoulder.
- Scissors
- A piece of tape or a clipboard to hold your strings.
While embroidery floss is perfect for beginners, plastic craft lace (often called gimp) is great if you want a sturdier feel.
How to Start Your Box Knot Bracelet
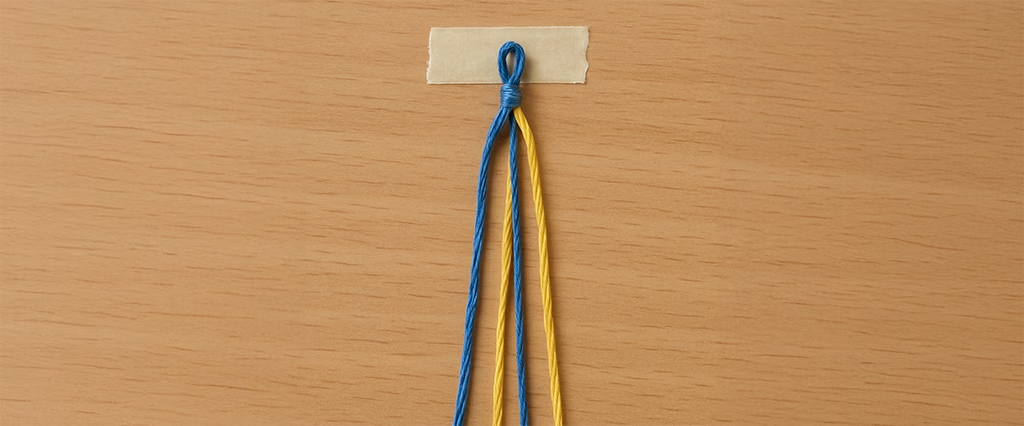
With your four strings cut to length, the first step is creating the starting loop. Gather all four strands, find the middle, and fold them in half. About an inch down from the fold, tie a basic overhand knot. This small loop holds everything together now and will act as a simple clasp for your finished bracelet.
Next, arrange your strings for the classic checkered pattern. Lay the strings flat below the knot and make sure the colors alternate. If you chose blue and yellow, your order should be Blue, Yellow, Blue, Yellow. This setup is the secret to the two-color design.
To make knotting frustration-free, secure your work. Use a piece of tape to stick the loop firmly to a table, book, or clipboard. This keeps your strings from tangling and helps you pull each knot with even tension. Now, you’re ready to make your first knot.
The First Step: Making the “4” Shape
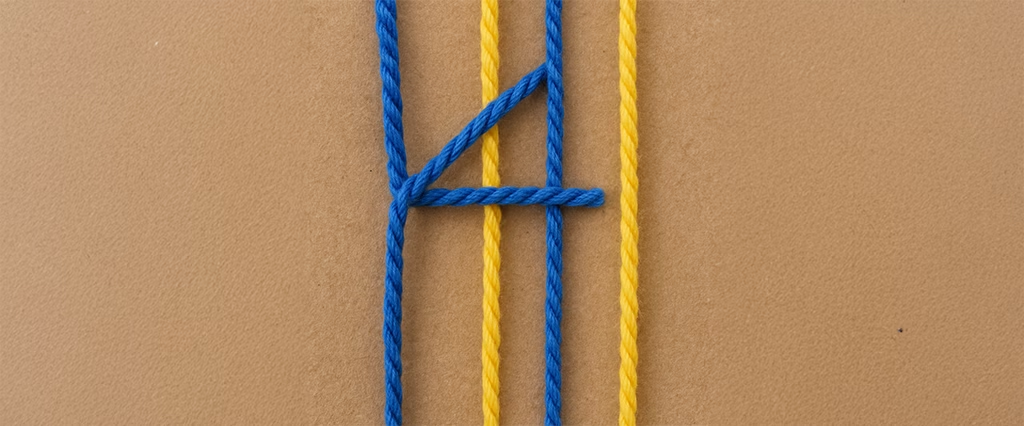
The two outer strings do all the work, while the two middle strings act as the core. Take the string on the far left and cross it over the two middle strings, laying it on the other side. This simple movement is the entire first part of the knot.
Look closely at your strings. You should see a shape that looks just like the number “4.” This iconic shape is the key to all square knot instructions. With your “4” in place, you’re ready for the second half of the knot.
The Second Step: The Tuck and Pull
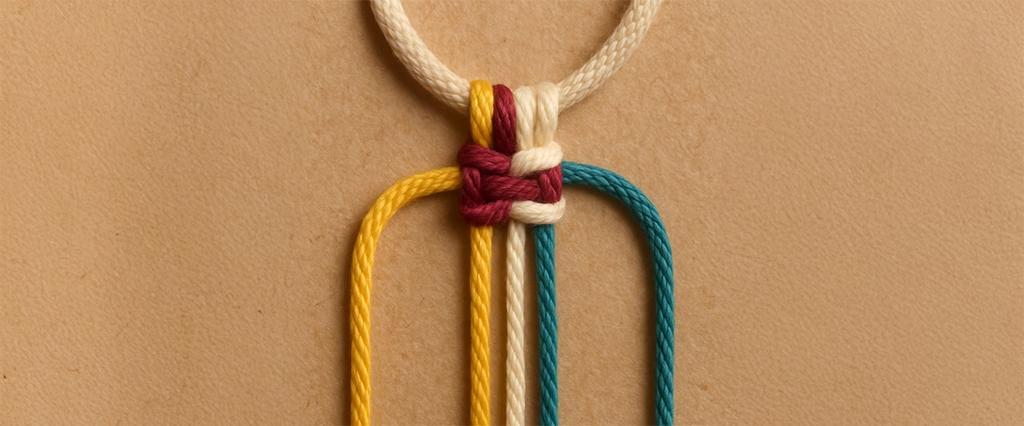
With your “4” shape in place, you’re ready to complete the knot. Take the string on the far right, guide it under the two middle strings, and then bring it up through the open loop of the “4.” Think of it like this: the left string went over the top, and this right string is tucking in from underneath.
Now for the magic part. Gently hold both outer strings and pull them evenly to the sides. You’ll see the loops slide together and tighten into a neat, flat square against your starting loop. Congratulations, you’ve made your first box stitch!
The entire bracelet pattern is just a repetition of these two steps. As long as you start your “4” shape with the same string each time, your bracelet will grow straight and even, preventing frustrating twists.
Help! Why Does My Box Bracelet Keep Twisting?
Noticing a twist in your design? If your bracelet looks more like a spiral staircase than a square chain, you’ve run into the most common hiccup. The good news is the fix is incredibly simple. Your bracelet keeps twisting because you are accidentally switching which side you start your knot from.
Consistency is the secret to a perfectly flat, square pattern. To create the “box” shape, you must begin your “4” shape with the exact same string for every single knot. It doesn’t matter if you always start with the far-left or far-right, as long as you stick with that choice.
But here’s a fun fact: you haven’t made a mistake, you’ve just discovered how to make a different pattern! The difference between a box knot and a spiral knot is all about consistency. Intentionally alternating your starting string is how you create a spiral bracelet. For this project, however, stick to one side to keep your knots perfectly square.
How to Finish Your Bracelet for a Perfect Fit
You’re on the home stretch! To check if your bracelet is long enough, wrap the knotted section around your wrist. Once it can comfortably wrap all the way around, it’s time to finish it off.
Securing the end is straightforward. Take all four loose strings and tie them together into one large, simple knot. Slide this knot up as close as you can to your last box knot and pull it very tight. This locks all your hard work in place.
To wear your new creation, just pass the tails through the loop you made at the beginning. This creates a simple and adjustable clasp without any extra hardware. You can tie the ends in a bow for easy removal or a secure knot for longer wear.
What’s Next? Taking Your Bracelet to the Next Level
Congratulations! You just made an awesome box bracelet. What started as simple strings has been transformed by your hands into a stylish, wearable piece of art. You’ve learned the essential knot that is the foundation for many friendship bracelet ideas, and now you can make it your own.
Taking your design to the next level is easier than you think. For a touch of sparkle, here’s how to add beads: simply slide a bead onto the two middle strings before tying your next knot, which will lock it in place. For more variety, try a 4-color box knot bracelet by starting with four different colors instead of two pairs—the steps are exactly the same.
You no longer see just a bracelet; you see a pattern built from a single, simple movement. That knot is now your creative tool. Experiment with new textures like yarn or paracord, mix in more colors, and trust the process. You’ve mastered the foundation, and the world of handmade accessories is now yours to explore.